You can use the domain that Shopify provides free of cost for your store. However, it ends '.shopify.com'. For most store owners, this is unattractive as it may appear unprofessional to their customers.
In order to allow shoppers to find your store with a custom domain like www.abchatstore.com, you will need to change the settings accordingly within the websites of your ecommerce host, ie Shopify and domain provider, ie GoDaddy in this case. The domain setup has the following 3 steps which will be detailed below.
In order to allow shoppers to find your store with a custom domain like www.abchatstore.com, you will need to change the settings accordingly within the websites of your ecommerce host, ie Shopify and domain provider, ie GoDaddy in this case. The domain setup has the following 3 steps which will be detailed below.
Step 1: Set up your custom domain as the primary domain on the Shopify website
IP address:
Step 2: Get the host (ie Shopify) IP address from Shopify
Step 3: Apply that IP address to the domain provider's (GoDaddy's) 'A' records (aka 'address' of the host or the address where the domain will be found. So 'A' refers to the hosting)
CName:
Step 2: Get the CName from Shopify
Step 3: Apply that CName to the domain provider's (GoDaddy's) 'CName' records
STEP 1
- In Shopify, select the 'Online Store' icon (that looks like a globe)
- 'Domains'
- In the 'Set Your Primary Domain' field, enter your custom domain
- Tick the field 'Redirect all traffic to this domain'
STEP 2 - IP Address
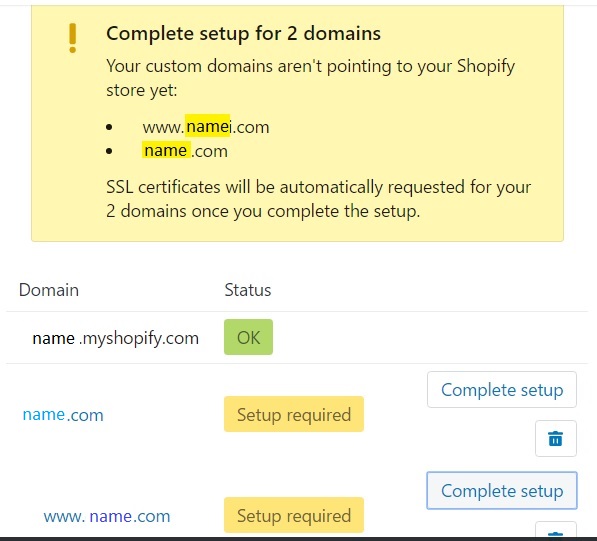
- On first line 'name.com' (NOT
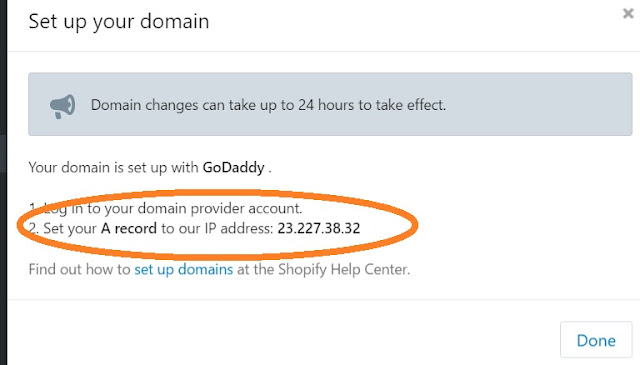
www.name.com) with the prompt 'Setup required', click the button 'Complete Setup' to get the IP address. The information will appear as follows.
----
-- --
STEP 3 - IP Address
- Log in to your GoDaddy account
- Select the domain in which you are interested
- Select 'DNS zone' (ie the 'Domain Name Server' that 'serves' the domain from the provider to wherever the domain will be hosted. AKA 'DNS Records', 'Resource Records' or 'DNS Zone Files')
In your domain provider account (example GoDaddy), you must now apply Shopify's IP address (as displayed in the image above) to the domain's 'A' records (for your chosen host which is Shopify in this case).
- Click 'Add record'
- Select 'A (Host)' when asked the type of record. The following dialog box appears.
- As suggested below, you will need to enter Shopify's IP address in the field, 'Points to'. You can leave the other fields empty.
- Click 'Finish'
--
--
STEP 2 - CName
- Back in Shopify, click the second line for which set up is required. It reads 'www.name.com' (NOT name.com)
- Copy the text that is highlighted below. (It is your Shopify's domain without the www)

STEP 3 - CName
- Back in your GoDaddy account, note the CName record with the 'www' host label.
- As shown below, tick the edit icon
- As shown below in the dialog box that appears, enter the Shopify domain name
- Click 'Finish'
- This process often takes a few minutes. However, it may take up to 24 hours before taking affect. When done, the 'Domain' screen on Shopify (referenced above) will look like this.


