How to Manage Staff Accounts in Shopify
- Log in to your Shopify admin account
- Select 'Account' in the left column
To add new staff accounts to Shopify
- Select 'Account' in the left column
- Scroll down to the 'Accounts & permissions' section
- In the 'staff accounts' section, click 'add staff account' and enter the details as pictured below. By default, the system gives new staff accounts full access. However, if uncertain, deselect the 'this staff account will have full permissions'.
- Once the details are entered, click 'send invite'. This will send an email to your (virtual assistant / VA) staff member
To change profile details and access settings for current staff account
- Select 'Account' in the left column
- Scroll down to the 'Accounts & permissions' section
- In the 'staff accounts' section, click 'add staff account' and enter the details as pictured below.
- Click the hyperlink with the staff member's name (as pictured immediately below)
- As an option, enter the staff member's profile details
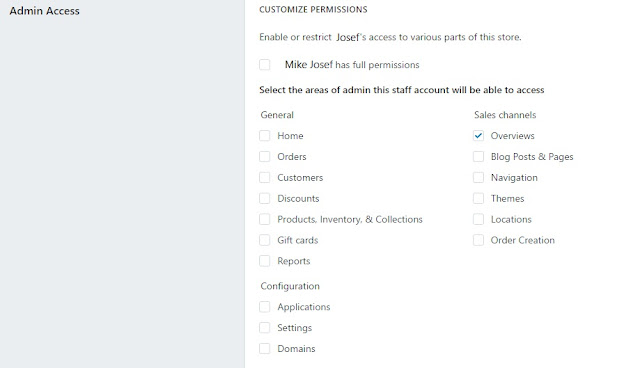
- Select and deselect the parts of your site where your staff member of virtual assistant should have access in the 'Customize permissions' section
--
--
CONTENT RELATED TO MANAGING (VIRTUAL ASSISTANT / VA) STAFF ACCOUNTS IN SHOPIFY


No comments:
Post a Comment
Note: Only a member of this blog may post a comment.